4
4
-
From the dashboard, click “New Request” (top right corner).

-
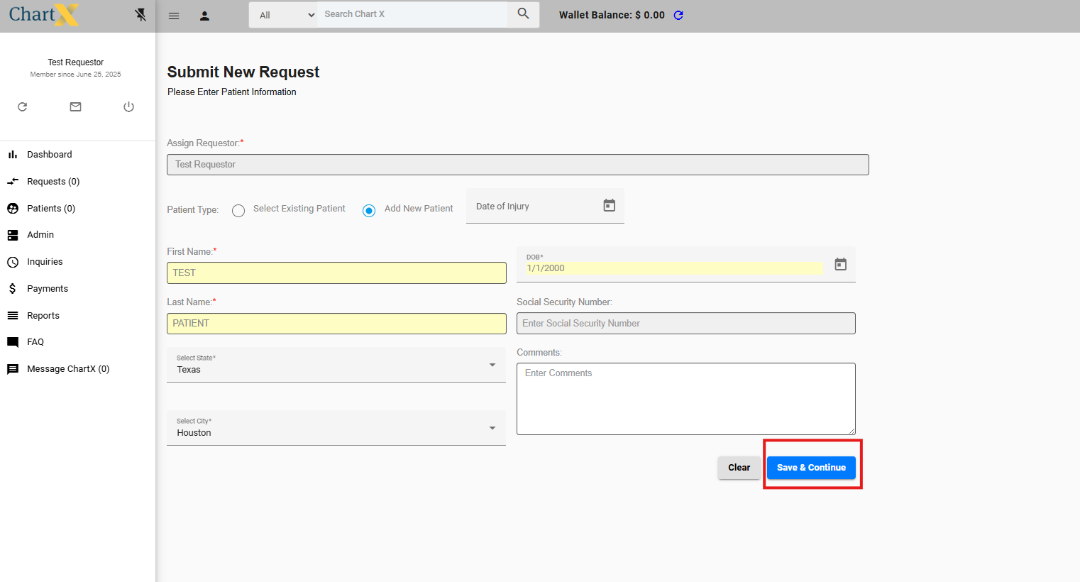
Enter Patient Information:
-
Click “Add New Patient.”
-
Fill out: First Name, Last Name, State, City, Date of Birth (required).
-
Optional: Social Security Number, Comments, Date of Injury.
-
Click “Save and Continue.”
-
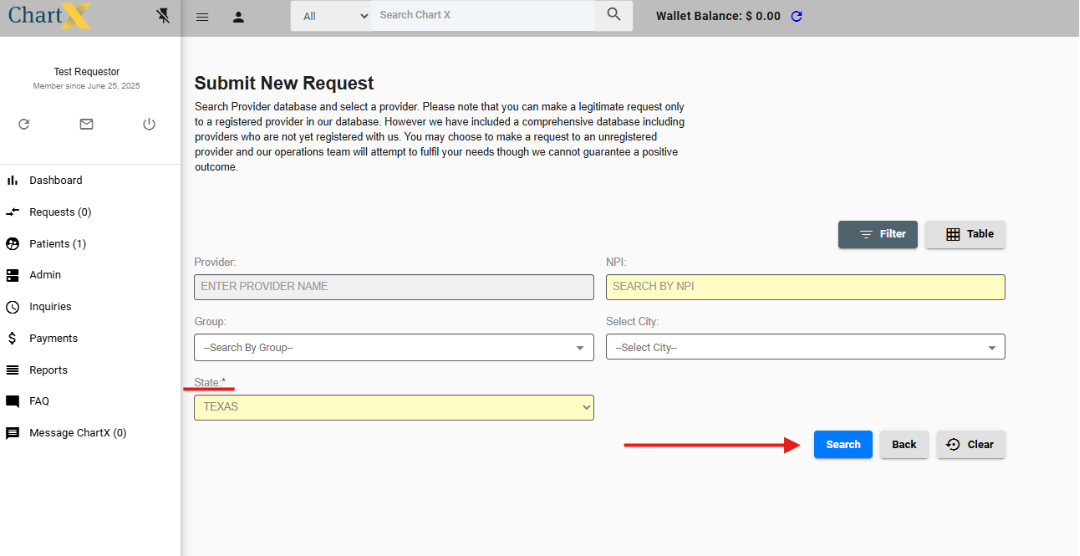
Search for the Provider:
-
Enter the State (required). You can also enter City or keywords to narrow the search.
-
Click “Search.”
-
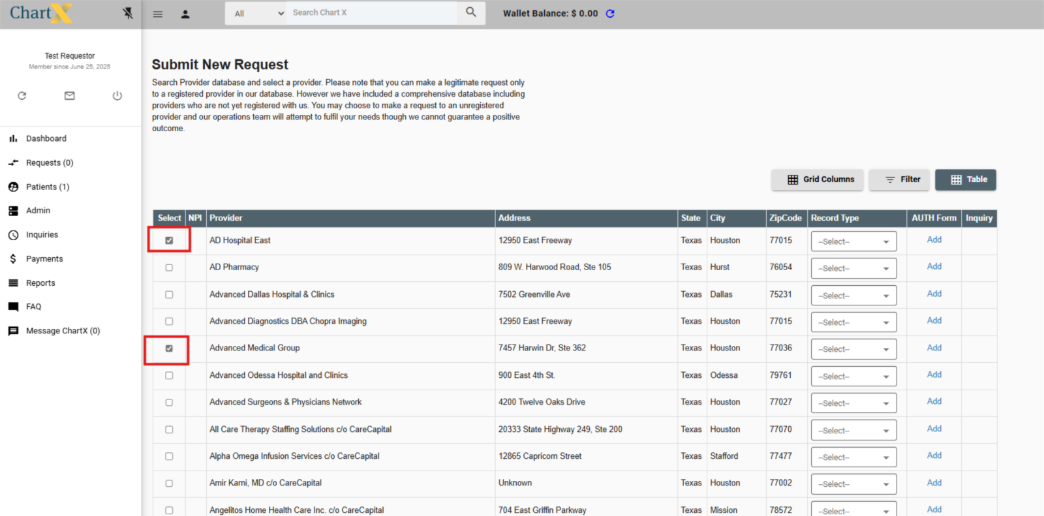
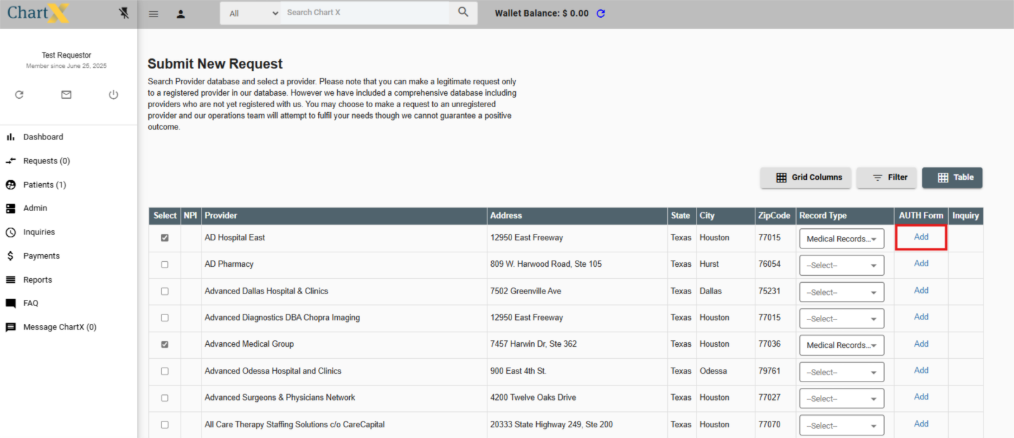
Select one or more facilities by clicking “Select” next to each name.
-
Choose Records Type:
-
Pick one or more: Medical, Billing, and/or Imaging records.

-
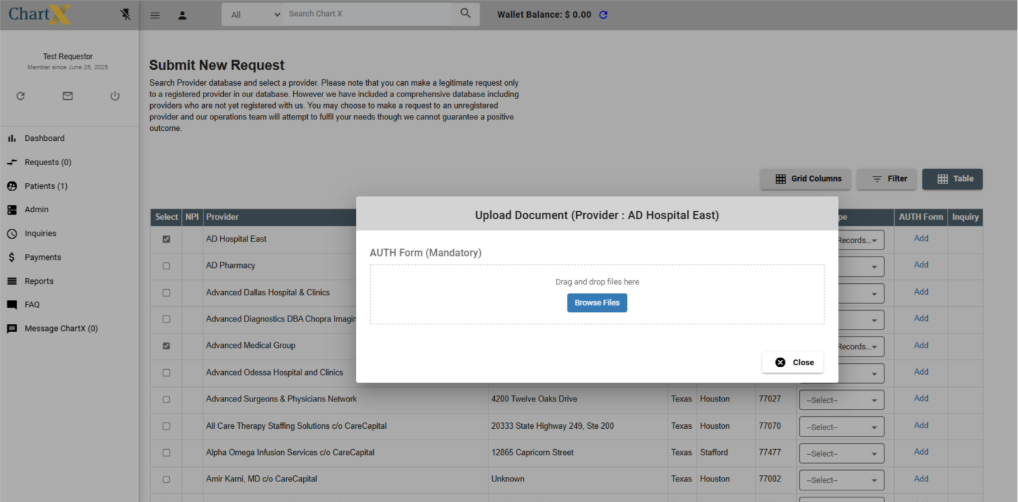
Upload Authorization Forms:
-
Click “Add” under the AUTH Form section.
-
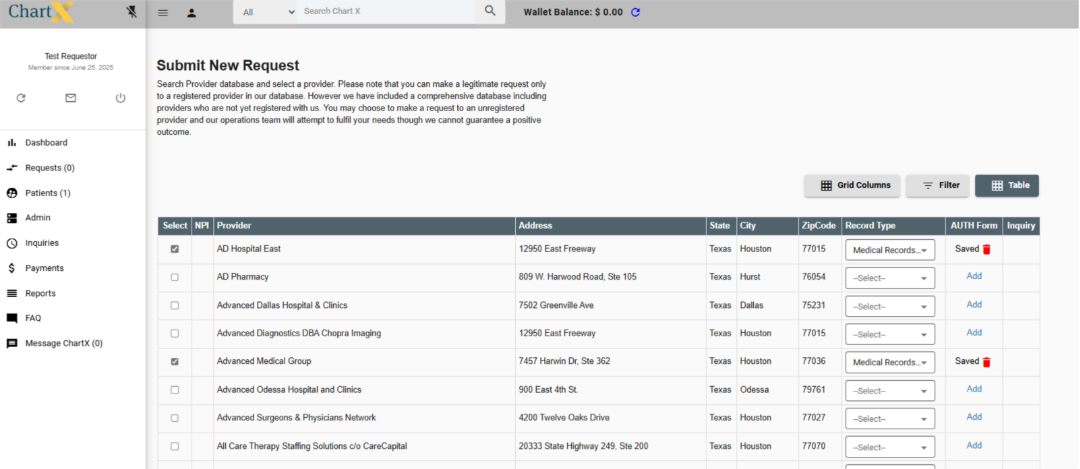
You’ll see a “Saved” message once uploaded.
-
Need to update? Click the trashcan icon to delete and re-upload.
-
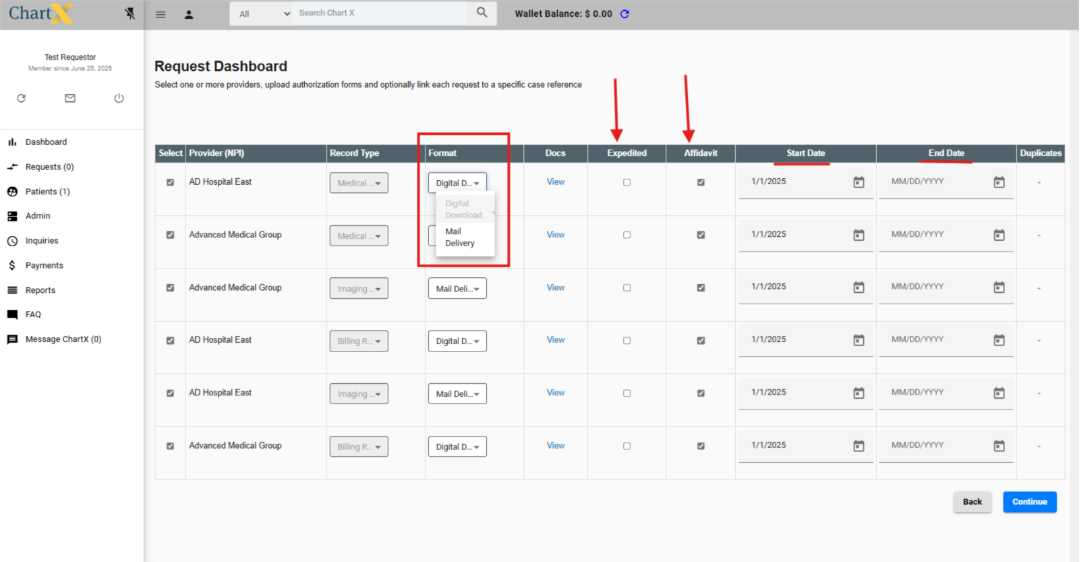
Select Delivery Format:
-
Choose Digital Download or Mail Delivery (Imaging is Mail only).
-
Optional: Choose Expedite (if available), uncheck Affidavit if not needed.
-
Add Start Date (auto-fills others), and optional End Date (defaults to today if blank).

-
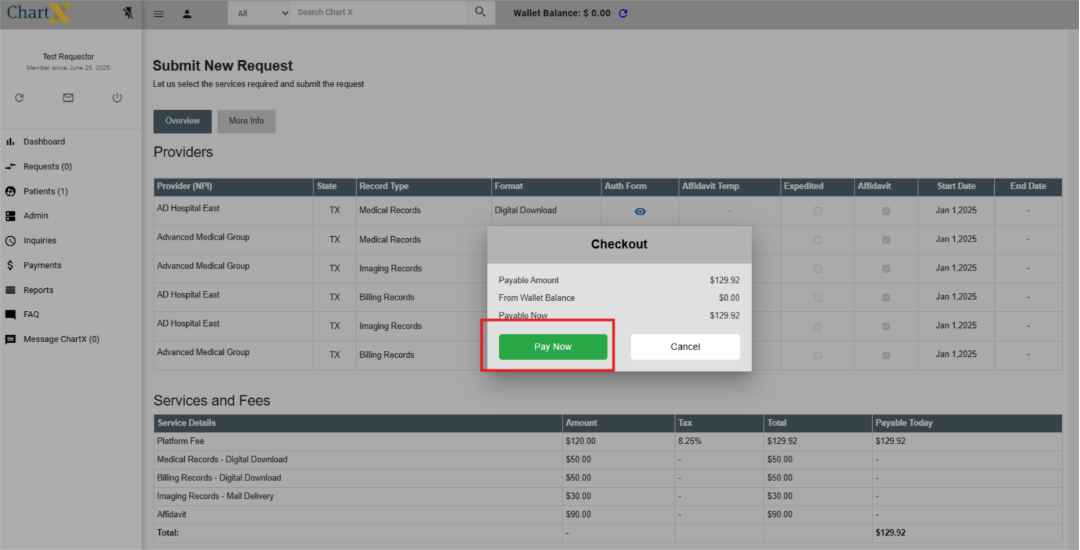
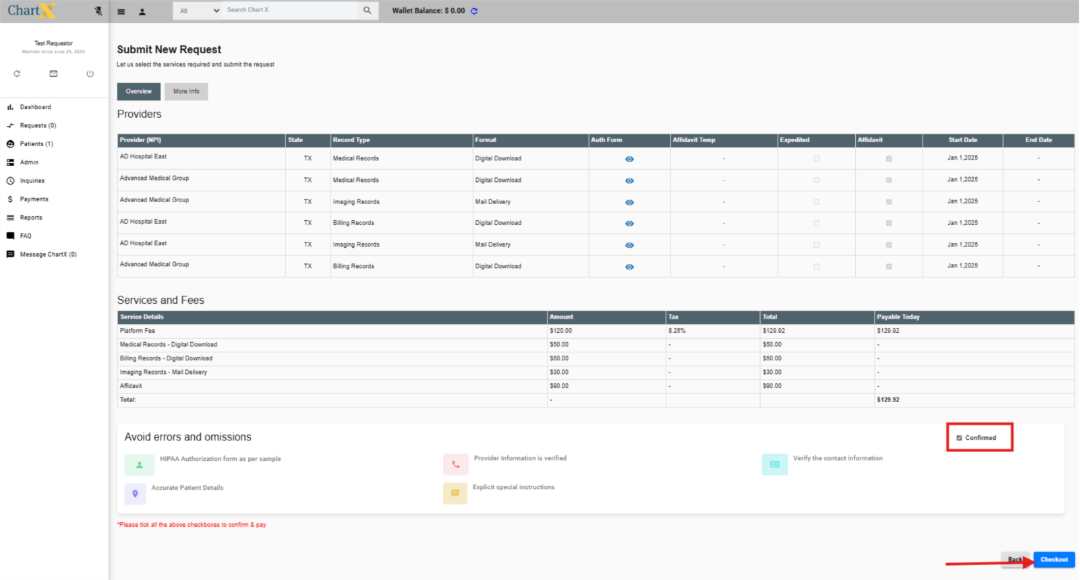
Review & Submit:
-
Confirm that all information is correct.
-
Check the confirmation box, then click “Checkout.”
-
Payment:
-
The platform fee is paid upfront. Record fees are billed later.
-
Click “Pay Now” to access the secure payment site.
-
Pay with a credit card.